

Shopify Rich-Text Input text editors (particularly the main Description for a product, a collection or a blog post) will accept additional local text formatting. The editor itself will not always display the results of this customisation, but they will be rendered on the site’s front end.
Though not strictly a bug, this is confusing behaviour.
So What’s Happening?
Cascading Style Sheets (CSS) are the rules which define how a website should look. Normally these rules are stored in a separate file (a stylesheet). But occasionally a rule is applied to a single item on a page – this is called an inline style.
<p>
    <strong style="colour: #ff0000">FREE</strong> haircut for our 10,000th customer
</p>Code language: HTML, XML (xml)
This will appear on the page something like this:
FREE haircut for our 10,000th customer
These additional styles can be copied from both other websites and word processing applications like Word. Word loves to apply inline styles.
Some browsers will allow you to ‘Paste as Plain Text’ but this sometimes gets missed, and there may be historical records in existing products, collections or blog posts with these instructions in.
You can write CSS overrides to prevent these being visible, but some cases will slip through. Much better to ensure there is no additional CSS in your markup to begin with.
Preventing Additional CSS
When creating a new item or adding new text.
- When pasting content in, use ‘Paste as Plain Text’ – this, however, is easily missed and is not available in every browser.
- A more ‘bomb-proof’ method is to copy the content source into an application which accepts no formatting e.g. Notepad (Windows) or Text (Mac). Then copy it from the basic app and paste it into Shopify.
- Complete the formatting using the Shopify rich-text editor.
Removing Existing Markup
Shopify has tools for doing this but they are hidden or require some expertise.
Using the Editor Tools
Highlight the problem text (and, if possible, some on either side). Select the three dots at the right-hand end of the main toolbar (a). This will reveal an additional set of tools. The last item will remove all formatting from the selected text (b).
You may need to reapply the formatting you do want after this operation.

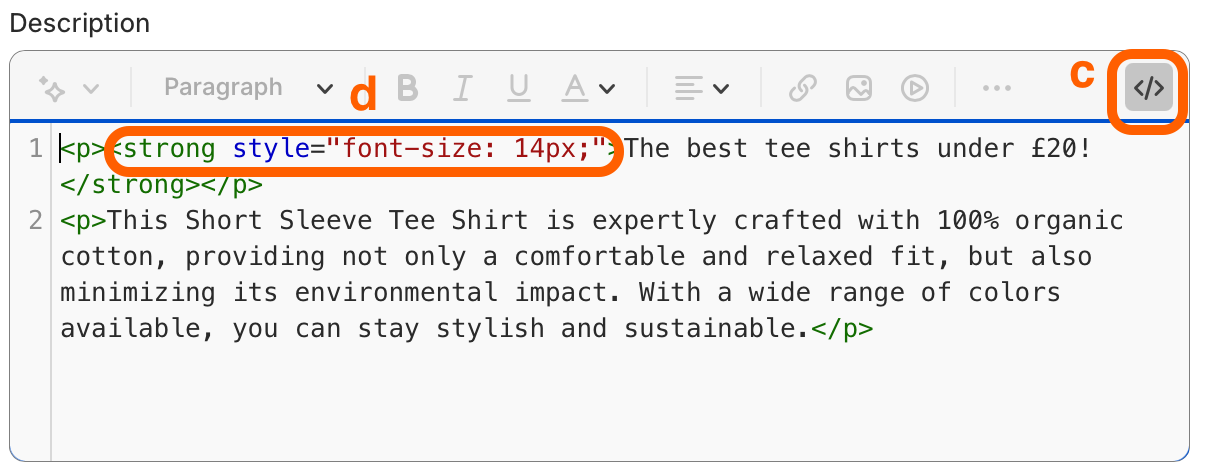
Editing the Markup Directly
If you are confident writing and editing HTML you can clich the right-most item in the editor toolbar, the </> icon (c). This will reveal the content as HMTL markup. You can then make any changes you wish including carefully removing inline styles (d).
Finishing Up
Once the changes are made, Save the Blog/Product/Collection you are working on. Dont forget that you will not be able to see whether or not your changes have worked in the editor window. You will need to review the results on the public page on the live site.
Didn’t Answer Your Question?
Shopify is a big system, if you’ve done everything above and your site is still giving you a headache you should talk to us. We will be able to help.